Showing posts with label dessert. Show all posts

Thursday, June 21, 2012

Midsummer Mustikkapiiras - or - Blueberry Yogurt Pie

When I returned to work after Molly was born, Malin, our first nanny, gave me the cookbook Sundays at Moosewood Restaurant as a Christmas gift. The recipes are inspired by cuisine from around the world and Mustikkapiiras is Finnish. Besides loving the look of Finnish words (they are so beautifully balanced with all the double vowels and consonants), I loved this recipe. Especially since baby Molly, who was a bit of a picky eater, was thrilled to eat the blueberries and lemony yogurt filling. I was happy she was eating anything, but this seemed very healthy considering the huge number of items she firmly vetoed. We all still love this dessert and on a warm summer evening, it can't be beat

Note: Fresh blueberries are essential here. We've tried frozen, but they just don't do this recipe justice.

Crust
1/3 cup butter
1/4 cup sugar
1 egg
1 cup flour
1/2 teaspoon baking powder

Filling
3 tablespoons sugar
3 tablespoons fresh lemon juice
2 eggs
1 cup plain yogurt - we love Chobani Greek Yogurt
1 teaspoon vanilla
pinch salt
2 cups fresh blueberries


PAM a 9- or 10- inch pie pan. Preheat the oven to 350 degrees.

Using an electric mixer, or a good deal of muscle, cream the butter and sugar. Add the egg and blend well. Combine the flour and baking powder in a small mixing bowl and then pour dry ingredients into the butter mixture and mix well until dough starts to collect together as a ball. With a spatula, scrap the side and collect the dough as a single, sticky ball. With flour-dusted fingers, pat the sticky dough into the bottom of the pan and up the sides. This is less exacting than rolling out pie dough, so you patch up spots where things look a bit too thin. You will probably need to repeat the flour-dusting as you work with the dough. Refrigerate the pie crust while you are making the filling.

Mix all filling ingredients, except the blueberries, in a clean bowl, until smooth. You can just use a whisk, but be sure to blend all the tiny yogurt lumps. Remove the pie pan from the fridge and place the blueberries as evenly as possible in the pie shell. Slowly pour the filling over the blueberries, turning pie plate to be sure the custard covers evenly.

Bake for 50 - 60 minutes, until the crust is browned and the custard has set. There may be a few cracks in the surface which just adds to its charm. Remove from oven and allow to cool for about an hour than place in refrigerator with a very loose draping of wax paper or clean towel. Allow to chill completely.

Saturday, April 28, 2012

Steal This Blueberry Cake

This cake is worthy of a bit o'crime. And, you can easily find an excuse to indulge any time of day. At 7:30, breakfast begs for coffee cake. 3:00 in the afternoon - a snack. Dessert is served at 6:45. I can't remember where the recipe came from, but we embellished it (with lemon juice on the berries) and simplified it (frozen wild blueberries, smaller & perfect).

Set oven to 350 degrees

Ingredients:
1 1/2 cup frozen wild blueberries
1/2 lemon
1/4 cup canola oil
1 egg
1/2 cup milk
1 1/2 cup flour
3/4 cup sugar
2 teaspoons baking powder
1/2 teaspoon salt

Topping:
1/3 cup brown sugar
1 tablespoon flour
pinch salt
1/2 cup oatmeal
1 1/2 tablespoon butter, melted

Blueberries: Put frozen blueberries in small bowl and squeeze lemon juice over. Set aside while you prepare batter and topping.

Batter: In a large bowl, combine flour, sugar, baking powder, and salt by tossing about with a fork. In another bowl, whisk together oil, milk, egg. Pour liquid into dry ingredients and stir together until just combined.

Topping: Place brown sugar, flour, oatmeal, and salt in small bowl and toss together. Pour melted butter over these ingredients and stir together until combined and crumbly. Spoon batter into PAM-ed 8" X 8" baking tin. Smooth out as it will be very thick. Place blueberries evenly on top of batter and then sprinkle topping evenly over blueberries.

 Place in oven and bake for 40- 45 minutes.

Monday, March 5, 2012

Lemon Pound Cake: A Tradition

In a world of uncertainty, you can be sure that there will be lemon pound cake waiting when you return to Michigan for a visit. This cake is a Mimi "welcome home" tradition and although Mimi is a bit scornful of cake mixes, she will be the first to tell you that this cake is decidedly from Duncan Hines. The cake itself is light and lemony. The glaze is so incredible that many people in my house eat the cake first and leave the glazed edges to devour last. This cake is simple, delicious, and lends itself to any occasion.

I won't repeat the entire recipe since it is on the box, but here are a few essential tips.

1. You will need Duncan Hines Lemon Supreme cake mix and Jello Lemon Instant Pudding. Follow recipe on side of the cake box. Take note: this recipe calls for 4 eggs.

2. You can use a bundt pan, but I prefer a tube pan. Grease the pan well before baking. After baking, cool for about 5 minutes and then run a knife around the edges to loosen but leave cake in the pan. Get ready to put glaze on the cake while it's still in the pan and warm from oven. This is key!

3. For glaze: in a small bowl, whisk about 1 1/2 cups powdered sugar with a pinch of salt. Then whisk in the juice of 1 or 2 lemon(s). You want the glaze to be free of lumps and to run slowly off the side of spoon. If it is too thin, just add more powdered sugar. If too thick, more lemon juice. Glaze is very forgiving.

4. Take a skewer or tooth pick and gently prick the the top of the cake all over. This lets some glaze find its way into the cake as well. Very subtle and very good.

5. Pour glaze over cake while it's in the pan, smoothing over the top and allowing it to run down inside and cover the cake's edges as well as the top. Glazing the cake while it's in the pan captures all the lovely glaze goodness for the cake.

6. After about 1 hour of cooling, once again gently run a knife around the edges of the pan and carefully remove the cake. Be sure to run your knife around cake pan every so often so your cake doesn't stick to the inside.

7. If you use a bundt pan, your cake will be upside down as the decorative, rounded side will be on the bottom. Though this may look a bit strange, the cake will be so delicious no one will notice. When removing the cake from the bundt pan, You will invert the cake on to a plate. Then place another plate on top and flip again so cake is glazed-side up.

Friday, January 6, 2012

Happiest Birthday Cake


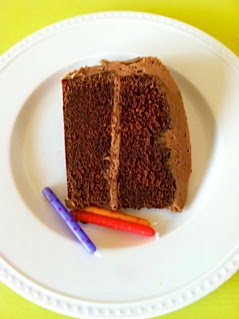
Yesterday, Elisabeth turned eleven and once again our family-favorite cake played the starring role. All credit for this incredible devil's food cake goes to a childhood babysitter, Mrs. Dykstra. I don't remember too much about her, other than her cake becoming Mimi's go-to recipe. Now, it's mine. I've crowned this cake with all sorts of frostings: vanilla, chocolate, mocha, and even whipping cream. All were staggeringly good. The strange, but wonderful, mystery surrounding this cake is that it gets better with each day. Of course, Mrs. Dykstra's cake only last two, may be three days at most, but they are VERY good days.

Set oven to 350 degrees

1/2 cup unsweetened cocoa - Hershey's works great
1/2 cup boiling water
2 teaspoons baking soda

Combine the cocoa & baking soda in a small bowl. Pour in boiling water, stir to combine fully, and set aside to cool.

2 1/2 cups flour
1/2 teaspoon salt
2 cups sugar
1 cup butter at room temperature
3 eggs
1 teaspoon vanilla
1 cup sour cream

Place flour and salt in a bowl, stir to combine, and set aside.

In a large mixing bowl, cream butter and sugar until fluffy. Add eggs and vanilla, mixing well. By now, the hot cocoa mixture will be cool-ish, so add to the butter mixture and beat well. Then, add half the sour cream and mix. Add half the flour mixture and mix again. Repeat with remaining sour cream and flour mixture.

Pour and smooth your batter into a PAMed tube pan. Bake for about 50 - 55 minutes. Keep an eye on the cake once you hit 50 minutes since you don't want to over-cook it. Cake should bounce bake when you gentle press the top or use a skewer to test for "doneness".

Monday, December 19, 2011

Christmas Bars


This is a slightly revised Mimi recipe called toffee bars. The twist is a topping of crushed candy cane rather than the original topping of toasted almonds. Toffee bars are delicious, but the nuts were an issue for a young lady from Port Chester, NY who banned them from the Favorite Dessert Poll at a recent family party. In a shameless attempt to reverse this decision, I thought peppermint candy would do the trick. So far, early results are very positive. I think Christmas Bars have a shot at a spot on the 2012 ballot.

2 sticks softened butter
1 cup light brown sugar
1 egg yolk
1 teaspoon vanilla
2 cups flour
1 bag chocolate chips (12 oz)
About 5 regular-sized candy canes, crushed*

Set oven to 350 degrees.

With a mixer, beat together the butter and brown sugar until light and fluffy. Add vanilla and egg yolk and beat until well combined.

To separate the yolk from the egg white, crack the egg firmly on the side of the bowl and pass the yolk back and forth, allowing the white to fall away into a bowl. If this seems daunting, crack the egg firmly on a bowl, place the entire egg into the bowl and with the smooth edge of one half of the shell, scoop out the yolk.

Add the flour and beat until batter holds together and looks crumbly. Place the batter into a PAM-ed 9 X12 baking pan. Pat the batter with your finger to get even coverage over the entire pan.

Place in oven and bake for about 20 minutes. Remove from oven and pour chocolate chips evenly over the surface. Return to oven and bake for another 4 minutes. Remove and with gently spread the chocolate over the baked surface with a knife. Once the chocolate is completely spread, sprinkle the crushed candy cane (or toasted almonds) about and gently press into the chocolate.

Allow to cool fully so chocolate hardens.

* To crush the candy canes, place unwrapped candy in a sturdy zip lock bag, lay a dish towel or newspaper over the bag, and use a good heavy frying pan to whack the contents. Candy cane bits are sharp and will pierce the bag which is why the dish towel or newspaper is a good idea.

Thursday, October 27, 2011

Gingerbread Heaven


I am absolutely sure warm gingerbread with whipped cream is served in heaven and that Laurie Colwin gave St. Peter the recipe. Gingerbread recipes vary wildly with many calling for boiling water or other unreasonable antics. This one is easy and antic-free. It is also a must for anyone residing in a cold weather climate such as, ahem, Chicago or Boston.

p.s. This recipe is adapted for the no-mixer kitchen. If you do have one feel free to put it to work.


Laurie Colwin’s Gingerbread

Ingredients
1/2 cup milk, including 1 tablespoon vinegar mixed in to “buttermilk-ify” it. Do this first and place on top of the warming oven so vinegar has a few minutes to work its magic.
1 stick of butter - very soft, but not melted
1/2 cup light brown sugar
1/2 cup molasses
2 eggs
1 1/2 cup flour
1/2 teaspoon baking soda
1/4 teaspoon salt
1 tablespoon ground ginger
1 teaspoon cinnamon
1/4 teaspoon ground clove
1/4 teaspoon ground allspice
2 teaspoons vanilla

Set oven to 350 degrees

Use a fork to cream butter with brown sugar until all the brown sugar is incorporated and the mixture looks like a sugary butter paste. Then beat in molasses; I find a wooden spoon or not overally flexible spatula works best. Follow by beating/whisking in eggs. I do the eggs one at a time to help make cake as light as possible.

Add all dry ingredients, mixing thoroughly. Whisk or beat in vanilla extract and milk.
Pour batter into Pam-sprayed tin. I use 9” round pan. Bake for about 30 minutes. You can use an 8” square pan, but you will need to adjust the baking time. Either way, test to see if center bounces back when you press lightly.

Remove from oven and allow to cool just slightly. Gingerbread is best when on the verge of hot. Eaten this way, gingerbread is heavenly. Adding whipped cream or slightly softened vanilla ice cream is heavenly+. You can freeze leftovers, if any remain.

Wednesday, October 5, 2011

Bread & Chocolate


This is simple and delicious.
This a snack/dessert/breakfast/lunch.
This will help you leap tall stacks of books.
This will soothe tiny, or not so tiny, annoyances.

This is bread & chocolate.

To make:
Take a good hunk of french baguette. I am not a snob about the bread here, but it should be a baguette. Your local supermarket's bakery brand will do. In fact, this may sound strange, but Target's baguette (they make a demi-monde size too) works very well and you can stock a few in your freezer.

Cut your bread in half the long way and toast it in the toaster oven. You can also wrap it in foil and warm in a 325 degree oven for about 7 or 8 minutes. Longer if bread is a bit frozen. I do not recommend the microwave as it tends to turns bread into stone statues in the blink of an eye.

Take the bread out of the oven and carefully place a nice piece of chocolate between the two halves. Press the two halves together gently to slightly melt the chocolate. Exhaustive research has led this household to prefer 60% cacao dark chocolate. Of course, dark chocolate has all those healthy anti-oxidants and iron, so you can feel virtuously indulgent. And if you like the more intense higher percentages of cacao, go for it - that's even better still. AND, if you only like milk chocolate, that's fine too. We all need our calcium.

I have also sprinkled roughly chopped roasted almonds over my chocolate before the "gentle press" of the baguette. I like this version too, however, some purists insist you must stick to two ingredients. I think you should judge for yourself. Bon Appetit!

Wednesday, March 9, 2011

Brownies Extraordinaire


The deliciousness of these brownies is due to a slight mishap that turned out very well. The recipe on the Bakers chocolate box said large pan; we went smaller (by accident) and a classic was born. Clearly, you never know what might happen in the kitchen, so do not despair! One minor warning: do not make this recipe if you crave solitude. The smell of baking brownies will have many, many people pounding on your door.

4 squares Bakers unsweetened chocolate
1 1/2 stick butter
2 cups sugar

1/2 teaspoon salt
3 eggs
1 teaspoon vanilla
1 cup flour


Heat oven to 350 degrees.

Melt chocolate and butter in medium size sauce pan. Watch carefully. Use low heat and stir often as chocolate burns easily. When both are nearly melted, remove from heat and continue stirring until completely melted.

Stir in sugar and salt until combined.

Stir in eggs vigorously. Your mixture is warm and you want to incorporate eggs before they set.

Stir in vanilla.

Gently stir in flour until all combined.

Pour into greased 8X8 pan and cook for 45 minutes.